day 6 continued: we arrived in Paris, checked into our hotel and strolled around Montmartre, which was where our hotel was located. We had a gorgeous view of the city from our room. Next we headed over to Champ Élysées and window shopped, and of course picked up a crepe from a street vendor to hold us over til we made it to LaDuree for the best macarons ever! I had pretty high expectations and they did not disappoint! It was really hard to choose with all the lovely colors/flavors available, but I managed to narrow it down to: Marie Antionette (a lovely aqua blue), pistachio, orange blossom and rose. At dusk, we made our way to the Eiffel Tower and hung out there for awhile and got to see the light show, sooo pretty!
Sunday, June 22, 2014
Monday, May 19, 2014
Europe trip part I: Amsterdam
Sorry about the long absence from the blog! My husband and I took our first overseas trip together for our 8th anniversary. It was a lovely getaway and we saw so many great sights (and ohh, the food!) I will be posting a recap of the trip in two segments...
The first place we went was Amsterdam. Our journey went like this:
day one: We explored the city, went to eat at a cute little place called Pancakes!, checked out some vintage shops, and just took in the beautiful canal houses and bridges, especially as they lit up in the evening. We found a great vegetarian/vegan cafe for dinner, de bolhoed.
Thursday, April 3, 2014
Toddler Craft: Nautical Magnets
Lately one of little A's favorite things to do is to paint with watercolors. I found the cutest little wooden shapes at Michaels for $0.29 each and they take watercolors quite well :) I love this craft because it can be displayed without taking up a ton of space and it also serves a purpose on the fridge.
Materials:
Wooden shapes of your choice
Magnets* (I used Neodymium rare earth kind, but any variety at your craft store will work)
Glue (I used Elmer's probond advanced non-toxic glue)
Watercolors and brushes
*NEVER leave a toddler alone with magnets, the magnets are meant to be glued on with adult supervision only.
Directions:
1.Have your child paint the wooden shapes with the watercolors...if you have a younger child you may need to help them fill in all the bare spots.
2. Allow watercolors to dry for a couple hours. Add a dollop of glue to the center of the back of the shapes, place magnet on to and allow to set for 24-48 hours.
Saturday, March 22, 2014
Storybook dress.
I am smitten with this new arrival in the shop. A beautiful, whimsical floral and bear print sleeveless dress with a lovely little mustard Peter Pan collar. This dress makes me dream about wandering through the woods and reading fairy tales. Limited quantities, so swing by and pick it up while you can!
Tuesday, March 11, 2014
Blood orange smoothie
Blood oranges are definitely one of my favorite fruits. So yummy and such a gorgeous color inside! I always get excited when I see them at the co-op. Today I'm sharing my recipe for a smoothie made with this delicious citrus wonder.
Ingredients:
1 cup strawberries (I used fresh, but frozen will also work)
2/3 cup frozen pineapple chunks
1 blood orange, peeled and separated into segments
1 cup regular orange juice
1/4 cup vegan coconut milk yogurt (or regular plain full fat dairy yogurt if you're not vegan)
2 tbsp sweetener of choice- I used maple syrup
1 tbsp coconut oil (optional)
Directions:
Place all ingredients in blender and blend on high until smooth :)
Wednesday, February 12, 2014
Avocado pineapple kale smoothie
I had an avocado that needed to be used so I looked around for smoothie recipes that used them...the recipes I found called for other ingredients I didn't have on hand, so I experimented with creating my own and it turned out quite lovely.
Saturday, February 8, 2014
Raw vegan raspberry cheesecakes in mason jars
One of the challenges I've facedwhile trying to eat clean has been craving sweets at night...sometimes I end up going wild and eating 10 cookies out of the bag :/ So my new plan is: at least once a week, make a batch of "clean" desserts in mini jars that can be a single, portion controlled serving...I'm hoping this will help cut back on the late night binging! This week's treat is so yummy I wanted to share :)
Raw Vegan Raspberry Mini Cheesecakes
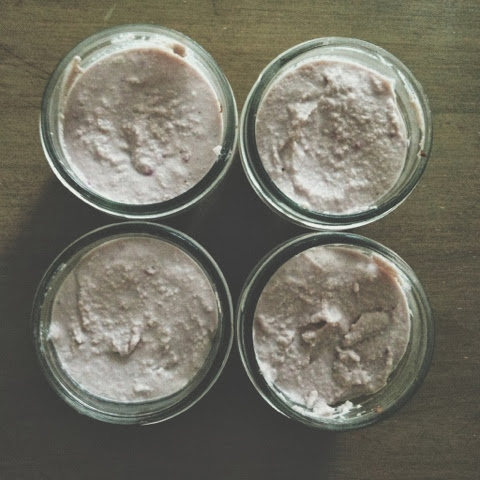
{makes 8 half-pint jars}
Ingredients
Crust:
1 cup raw pecans
2 tbsp raw cocao powder
1/8 tsp sea salt
1 1/2 tbsp maple syrup
Filling:
1 1/2 cups cashews (soaked at least 8 hours)
1/3 cup virgin coconut oil, melted
1/4 cup maple syrup
1 tsp vanilla
1/4 cup raspberries (I used frozen, but fresh will work too)
Juice of 1 lemon
Optional ganache topping:
2 tbsp coconut milk
2/3 cup non-dairy chocolate chips
Directions:
In a food processor, combine dry ingredients and process until pecans are in tiny pieces, then drizzle with maple syrup and pulse until combined. Divide crust mixture into the 8 jars and press it down so that it sits flat in the bottom of the jar. Next, drain the cashews and place them in the food processor along with all other filling ingredients except the coconut oil. Process until cashews become crumbs, then drizzle on coconut oil and continue to process until creamy (this may take a couple of minutes). Pour filling into jars, refrigerate for at least 6 hours before serving (overnight is best). These will keep in the refrigerator for up to a week.
For the optional ganache step (I made half of mine with ganache and half without), heat coconut oil in a pan (or in a bowl in the microwave like I did) until just boiling. Remove from heat and immediately stir in chocolate chips. Pour on top of cheesecakes before refrigerating.
Enjoy!
Subscribe to:
Posts (Atom)